Garlic Parmesan Dinner Rolls
23 October 2018 by Natanja
Super fluffy and garlicky dinner rolls with a parmesan crust and garlic butter topping.
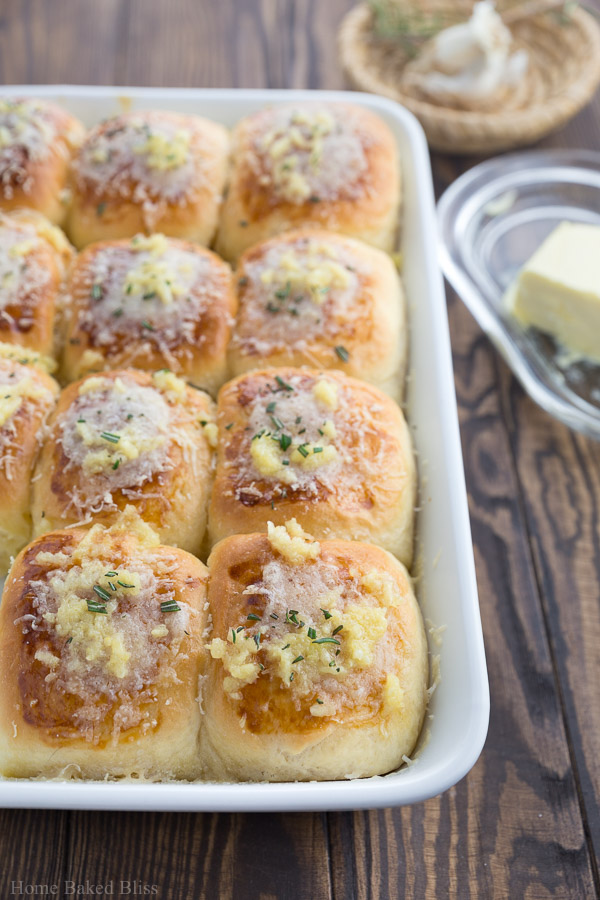
I am incredibly excited to share todays recipe with you. Okay fine, I am usually very excited when sharing recipes with you…but todays recipe is special. It took me quite some time, elbow grease and of course lots of flour and butter to come up with this recipe. I wanted it to be the most incredibly fluffy and flavourful recipe for dinners rolls ever. That meant some serious recipe testing and of course lots of extra dinner rolls that are all sitting in my freezer now from batch 1, batch 2, batch 3,… you get the point! But despite the weird looks I received at the grocery store from buying baking ingredients in bulk like a maniac, I am super happy to present to you my recipe for garlic parmesan dinner rolls.
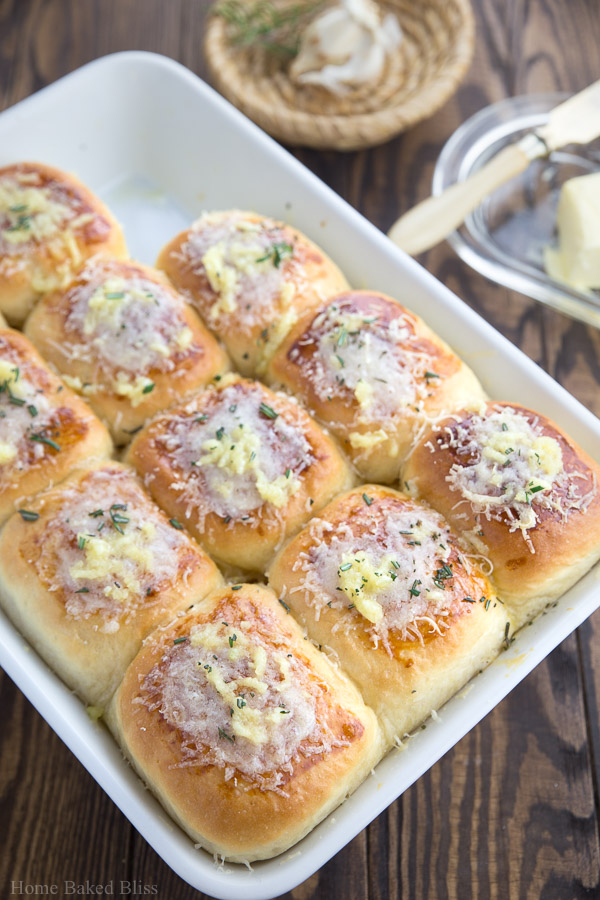
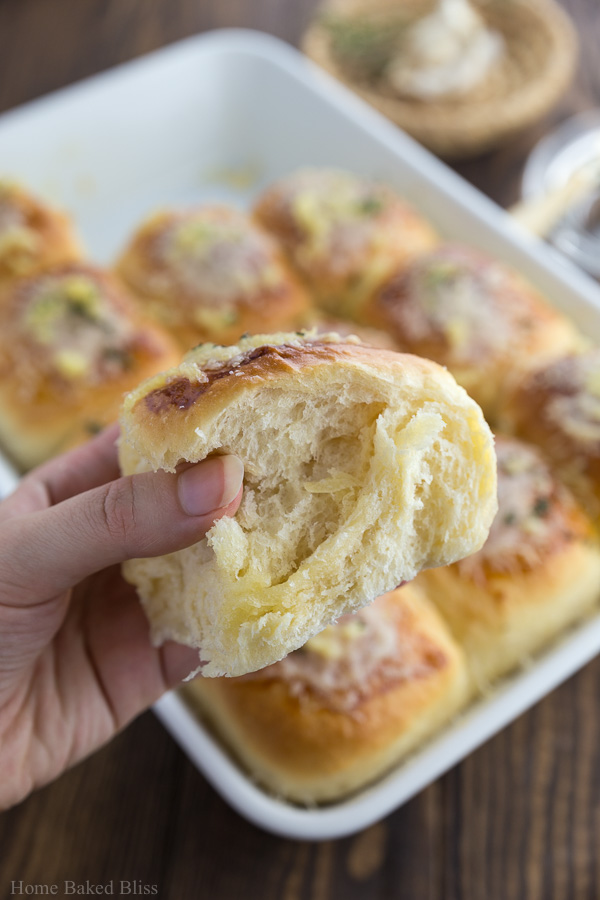
If you like your dinner rolls fluffy, soft and slightly sweet, you are going to love these! They are buttery, light and melt-in-your-mouth-tender. Totally not exaggerating here! (Scroll down for a closeup to get a better look.) They make a lovely side dish for Thanksgiving or just your ordinary family weeknight dinner. Granted, they take a few hours to come together, but they can be made ahead or even frozen which makes them incredibly convenient. These babies don’t lack any flavour as they contain just the right amount of spices.
Let me tell you, these dinner rolls don’t just contain a faint hint of garlic that you need to search for to know it’s actually there. Nope! These dinner rolls hold what they promise. You can definitely taste the garlic flavour inside and on top of the dinner rolls. It is by no means overpowering though. You can still use these dinner rolls as a boat for your sauces, soups and gravy and of course to soak up the last bit of deliciousness on your plate. They are still subtle enough in taste not to interfere with other flavours. They also have a wonderful texture, soft and fluffy but compact enough for dunking. Are you also licking the screen by now? *Ahem, me neither. 😉
Yeast
Proofing
The leavening agent in our dinner rolls is yeast. Yeast is a type of fungi which converts sugar to carbon dioxide and expands itself. It’s a living thing which means that it always needs to be ‘proofed’ before continuing with the recipe to ensure that it is not dead. (I know this all doesn’t seem very appetizing and believe me, talking about living fungi with a sweet tooth is not how I had planned to spend my day, but bear with me here.) Proofing the yeast means dissolving it in either warm milk or sugar. It either starts bubbling/foaming slightly- a sign that it is alive and well, or it does nothing- a sign that it is now pushing daisies. If your yeast is dead, it is important that you throw it out and start over.
The right amount
Using the right amount of yeast is critical to getting fluffy and delicious dinner rolls. Not using enough yeast will result in a flat and not at all fluffy dinner roll. However, using too much of it will result in a strong alcoholic, yeast-like taste which is very unpleasant and the texture of your rolls will be off. When working with yeast, whether fresh or dry, it is important to use the exact amount the package calls for. E.g. 1 cube of fresh yeast is enough for 1 kilo of flour.
Fresh vs. Dry
Or what I like to call, the eternal debate. I have heard plenty of times from chefs and people working in bakeries that fresh is best. However, there are also plenty of people who claim they cannot taste a difference and that dry yeast is more convenient. I personally always try to use fresh and usually have a few cubes of it in my fridge. For this recipe you can use either one. Just make sure to use the appropriate amount depending on which one you chose. See recipe note below.
I already apologize now, because this post is about to get even longer! You are welcome to skip ahead to the recipe if you do not want any additional info. I just want to be thorough and answer any questions you might have during the process.
Stand Mixer
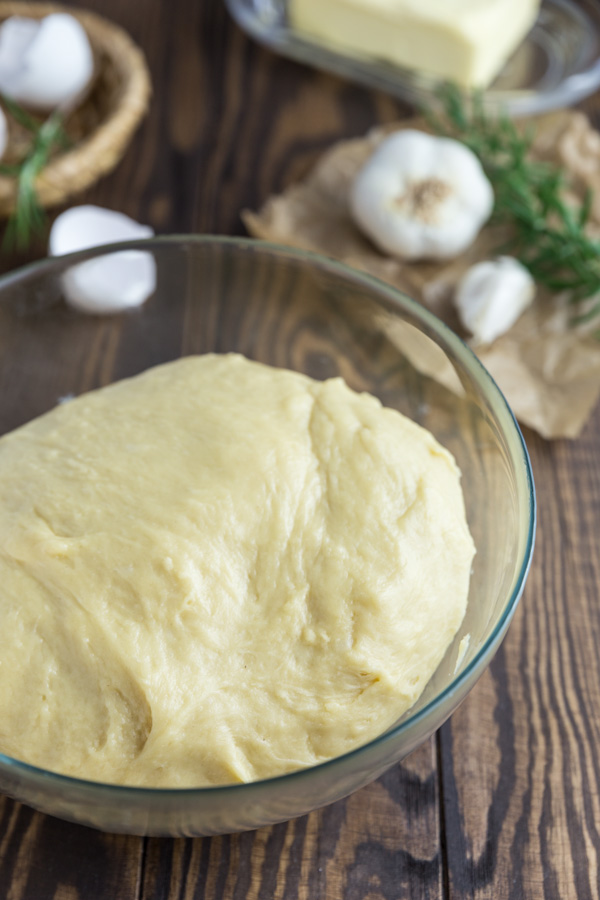
For this recipe a stand mixer is a huge help and does the hardest part of the job for you. If you do not own a stand mixer you can still make this recipe, it will require a fair amount of elbow grease though. Combine the ingredients for the dough in a bowl but instead of letting the stand mixer do the work for you, start mixing everything together with a spatula or spoon (whatever you find easiest) until you cannot mix it any longer. Then remove the dough from the bowl and knead it with your hands until it is homogenous. Your dough should be slightly sticky, but not too sticky to handle. Flour your hands to prevent it from sticking to your fingers.
Rising Time
It is important crucial to give your dough enough time to rise. Only a yeast dough that has had plenty of time to rise will bake into fluffy and soft rolls. Cutting away from that time will not give you the same results. This is not a recipe for when you need to be somewhere in 2 hours. Rather make this recipe when you have enough time on your hands, or read my tips for preparing it ahead of time.
If you are making these dinner rolls for Thanksgiving dinner, I highly suggest preparing them until step 5 and then continuing the next day. Just make sure to wrap them tightly with plastic wrap so they do not dry out. If you have any leftovers, freezing them is the best way to keep them fresh. When you are ready to eat them, reheat them in the oven until they are warm and enjoy! They don’t taste 100% like fresh, but they come pretty close.
Garlic Butter
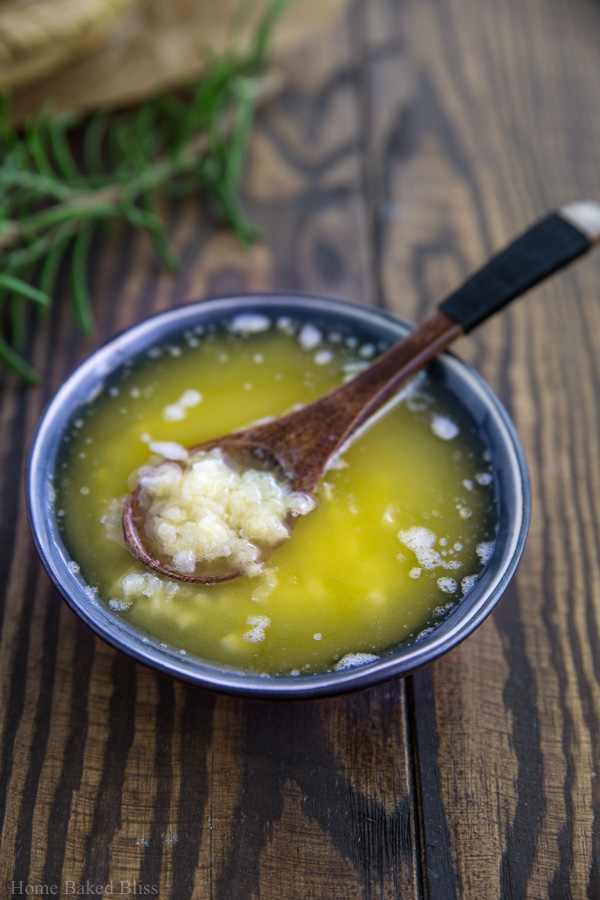
The best thing about these dinner rolls is without a doubt the garlic butter. Poured over the freshly baked dinner rolls, it not only makes your home smell amazing, it also softens the dinner rolls and gives them a wonderful garlic aroma. If you do not like a pungent garlic taste, simply roast the minced garlic in the butter until golden brown. This takes away the sharpness of the garlic without diminishing the flavour.
If you do not like rosemary, you can add any other herb(s) of your liking. I highly suggest using some kind of herb as a topping to give the dinner rolls more flavour and a nice pop of color.
Like great dinner rolls should be, these garlic parmesan dinner rolls are suuuuper fluffy and tender. I mean seriously, look at that! ↓
If you give these garlic parmesan dinner rolls a try, be sure to let me know in the comment section down below! I always love hearing from you. ♥
Print
Garlic Parmesan Dinner Rolls
- Prep Time: 30 minutes
- Cook Time: 20 minutes
- Total Time: 3 hours and 50 minutes (includes rising time)
- Yield: 12 (serves 6) 1x
Description
Super fluffy and garlicky dinner rolls with a parmesan crust and garlic butter topping.
Ingredients
Garlic Parmesan Dinner Rolls
- 250ml whole milk (1 cup), slightly warm*
- 1/2 cube fresh yeast**
- 70g white granulated sugar (1/3 cup)
- 2 teaspoons garlic powder
- 1 teaspoon salt
- 2 eggs, room temperature
- 110g butter (1/2 cup), room temperature
- 540g all-purpose flour (4 and 1/2 cups)
Garlic Butter
- 80g butter (1/3 cup)
- 2–3 garlic cloves
Extras
- 1 egg yolk, for brushing
- 60g finely grated parmesan (1 cup)
- 1 teaspoon minced fresh rosemary
Instructions
- Add the warm milk to the bowl of your stand mixer. Crumble in the yeast and sprinkle the sugar on top. Stir everything until combined then let it sit for about 5-10 minutes until the yeast is dissolved and bubbling or slightly foamy. If not, start over with a fresh package of yeast.
- Add in the garlic powder, salt, eggs and butter and mix everything until combined. The butter will seperate from the mixture, that’s okay.
- With the stand mixer running on low speed, add in 4 cups of flour. Then slowly add in up to 1/2 cup more until you reached the right consistency. The dough should be soft and still slightly sticky, but not too sticky to handle.
- Cover the bowl with plastic wrap and let it rise in a warm place for 2 hours, until it has doubled in volume. In the meantime, coat a 23cm x 34cm casserole pan (9x 13 inches) with non-stick spray.
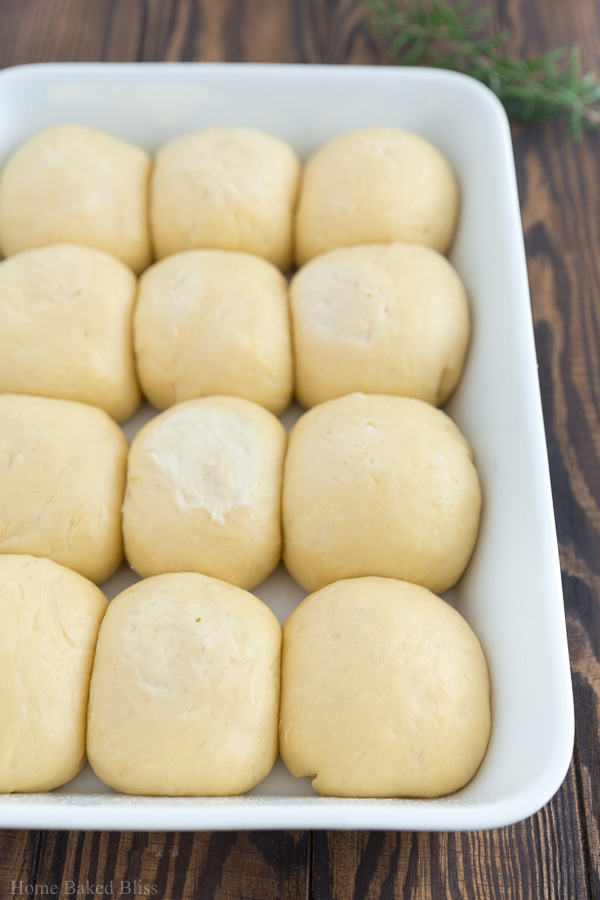
- Once the dough had enough time to rise, punch down into the center of the dough to release the air. Then form into 12 equal size balls and place into the greased casserole pan. Cover the pan with plastic wrap and let them the dough balls rise for 1 hour.
- In the last 15 minutes that the dough is rising, preheat your oven to 180C (350F).
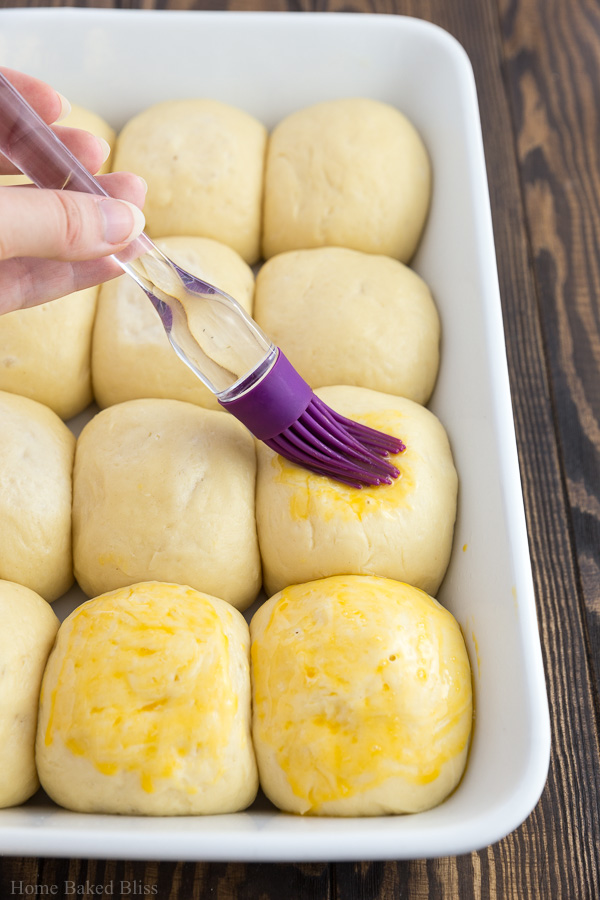
- Brush the tops of the dough balls with a whisked egg yolk. Then bake for 15 minutes and remove from the oven.
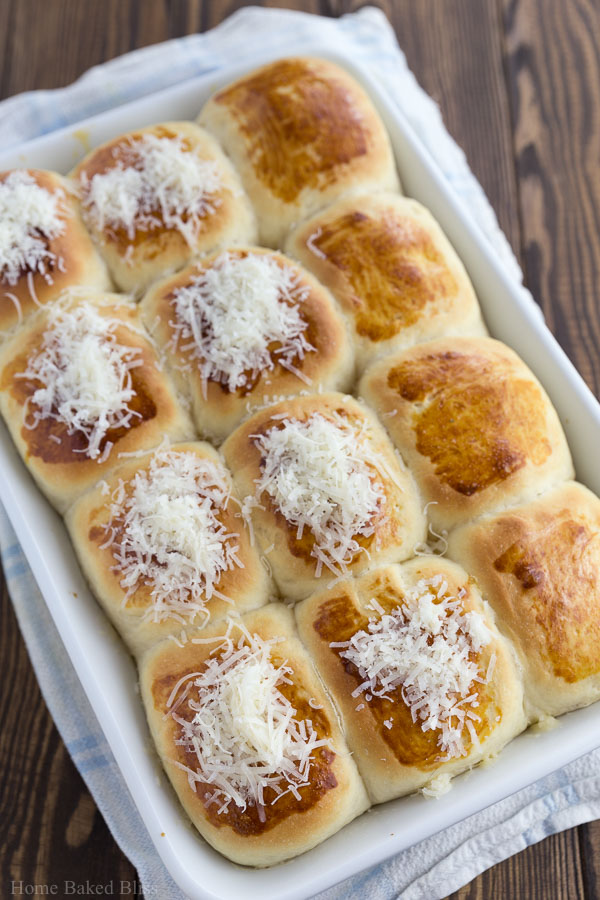
- Sprinkle the grated parmesan onto the rolls and bake for an additional 5 minutes.
- In the meantime, prepare the garlic butter by melting the butter in a small saucepan. Once melted add in the garlic and roast until fragrant.
- Remove the rolls from the oven and brush with the garlic butter. Sprinkle with rosemary and serve warm or at room temperature.
Make ahead tip
Stop at step 5, after covering the casserole pan with plastic wrap and store the dough balls in the fridge until the next day. Make sure to wrap the pan tightly so the rolls will not dry out. Then continue the next day by letting them rise for 1 hour.
Notes
*The milk should be around 30C (86F) and not exceed 40C (110F). Slightly warmer than room temperature is perfect.
**If substituting for dry yeast use 1 sachet (7g).
Baked dinner rolls can be frozen for up to 2 months, stored in a Ziplock bag. Reheat frozen rolls in the oven.
MORE FROM MY SITE
Disclosure: This post may contain affiliate links, but these are all products I highly recommend. I won’t put anything on this page that I haven’t verified and/or personally used.
Tagged With: bread rolls, dinner rolls, garlic parmesan dinner rolls, Thanksgiving
Filed Under: Entrées & Sides, Fall & Thanksgiving Recipes